![]()
Model 1525, High resolution XL thread and low contrast phantom
|
|
|
Model 1525, High resolution XL thread and low contrast phantom
|
|
|
||
|
|
||
|
|
||
|
|
||
|
|
||
|
|
||
|
|
||
|
|
||
|
|
||
|
|
||
|
|
||
|
|
||
|
|
||
|
|
||
|
|
||
|
|
||
|
|
||
|
|
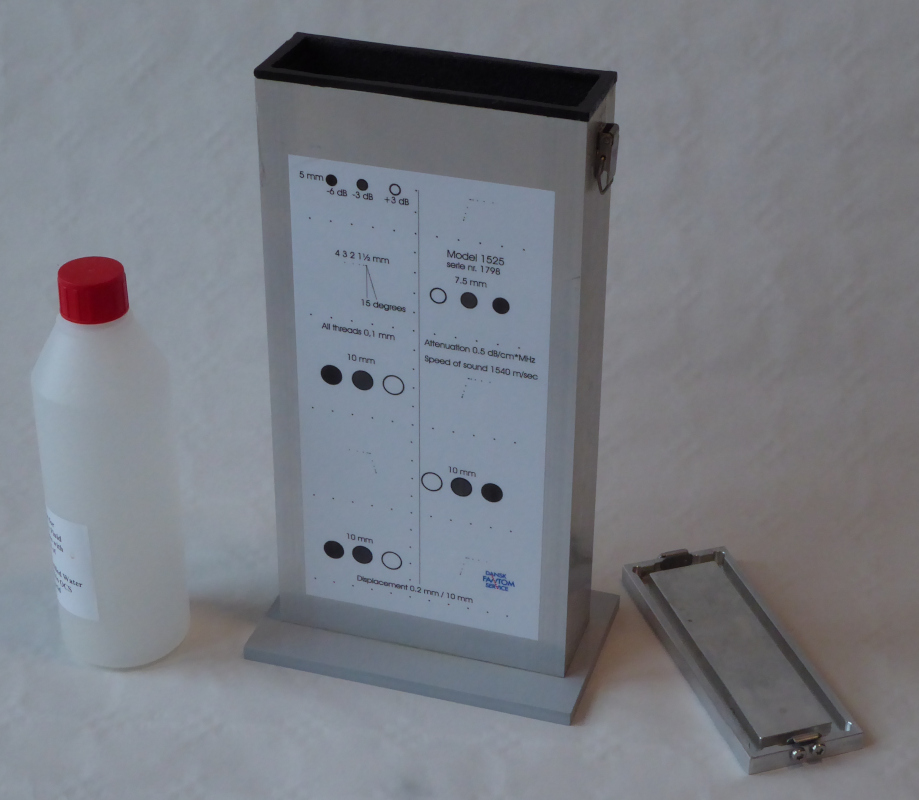
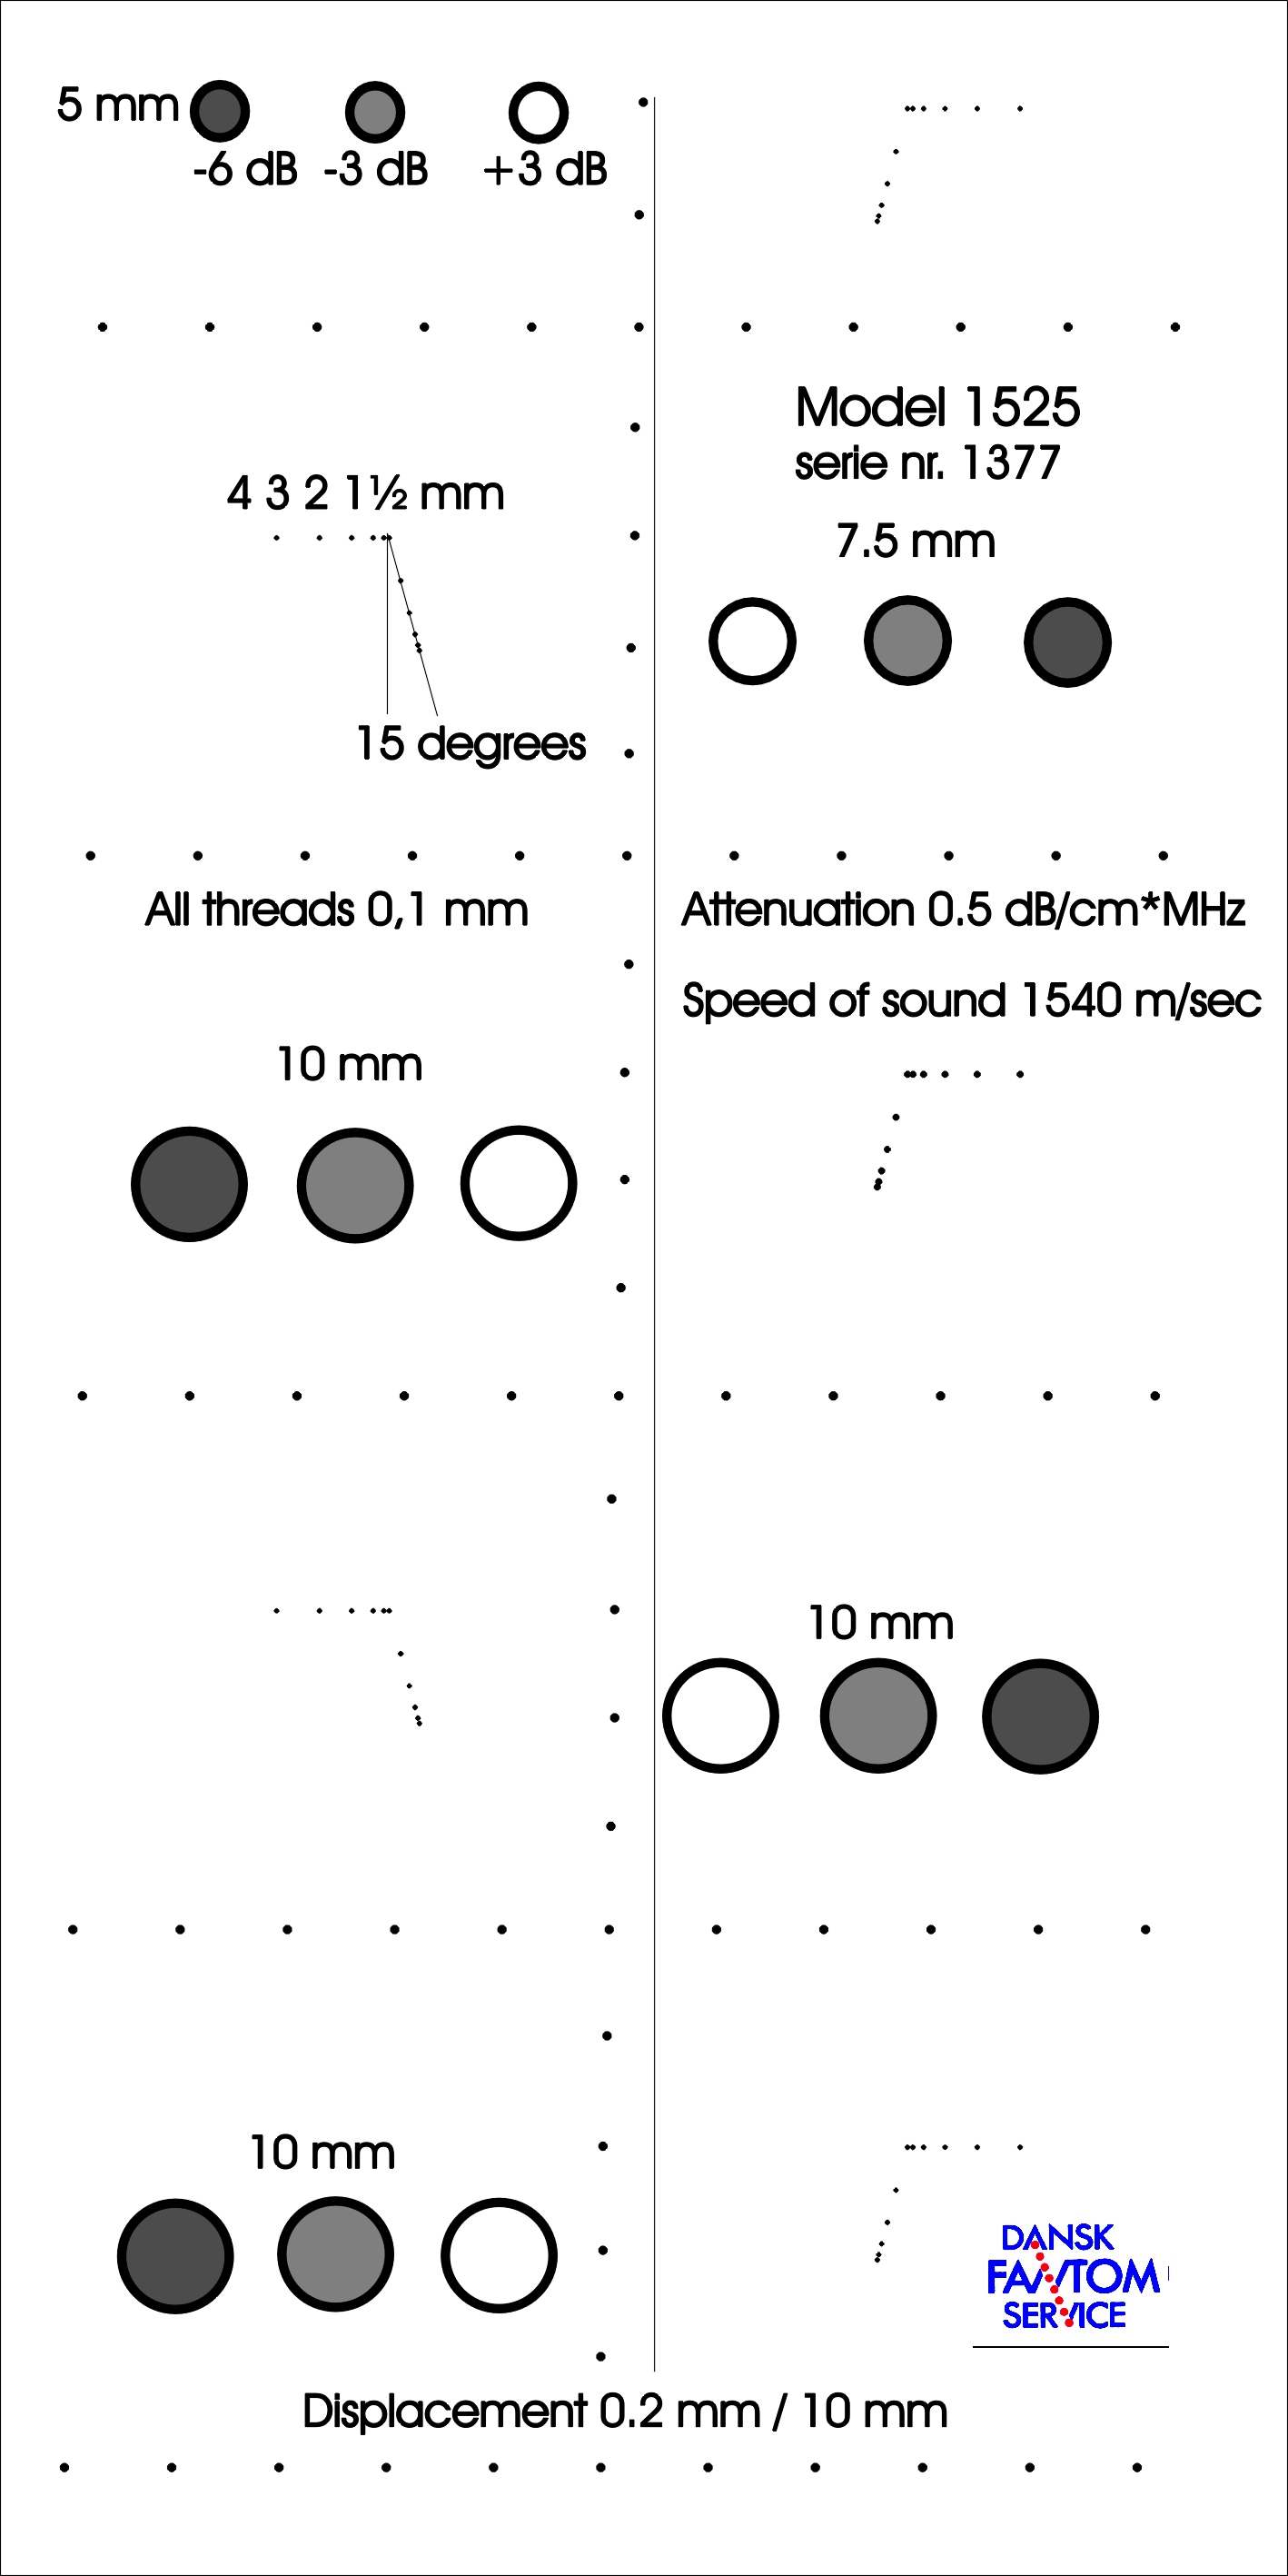
Model 1525 Extra large wire and low contrast phantom for transducers with high penetration
The phantom is 12 cm wide, 24 cm high and 4 cm deep. At the scanning surface the inside of the box is 14 cm wide.
The surface is covered with a protective plate of 0.5 mm PP, that allows transmission of Ultrasound.
The phantom contains:
73 threads for 30-40 dB axial and lateral resolution and geometry control. The position of each individual thread is correct within +/- 0,2 mm.
5 groups of 11 threads for 6 dB axial and lateral resolutions.
5 groups of low contrast cylinders, that deviates + 3 dB, -3 dB and -6 dB from the background. The first group is 5 mm in diameter and is centred 1 cm below the surface. The next group is 7,5 mm in diameter and is centred 6 cm below the surface. The last 3 groups are 10 mm in diameter and are centred 11 cm, 16 cm and 21 cm below the surface.
Attenuation of background material 0,5 dB * cm * MHz. Tolerance see data sheet.
Sound speed of background material 1540 m/sec. Tolerance see data sheet.
All threads consists of 0,1 mm nylon.
Outer dimensions: 15 cm * 9 cm * 31 cm
Weight: 3 kg
Instructions:
If air is trapped under the protective surface then, just cover the surface with preservative fluid and press gently in the middle of the plate. Then the air will slip out of the small holes that are drilled in the periphery of the plate.
20 dB beam width:
1) Optimise the focus of the scanner in the region of test.
2) Reduce the amplification, so that the threads just can be seen.
3) Increase the amplification 20 dB.
4) Measure the dimensions of one wire axial and lateral.
Repeat step 1 to 4 at relevant depths.
6 dB beam width:
1) Optimise the focus of the scanner in the region of test.
2) Adjust the amplification, so that the wires are medium grey.
3) Notice how many of the wires in the 6 dB group that can be seen.
Repeat step 1 to 3 at relevant depths.